Monday 13 July 2015

Installing Windows Server 2012 Active Directory via Server Manager. Active Directory Concepts

This article serves as an Active Directory tutorial covering installation and setup of a Windows 2012 Domain Controller using Windows Server Manager (GUI).
Readers interested in performing the installation via Windows PowerShell can read this article.
FREE Hyper-V Backup:  FREE for Firewall.cx readers for a Limited Time!  Download Now!

What is Active Directory?

Active Directory is a heart of Windows Server operating systems. Active Directory Domain Services (AD DS) is a central repository of active directory objects such as user accounts, computer accounts, groups, group policies and so on. Similarly, Active Directory authenticates user accounts and computer accounts when they login into the domain. Computers must be joined to the domain in order to authenticate Active Directory users.
Active Directory is a database that is made up of several components which are important for us to understand before attempting to install and configure Active Directory Services on Windows Server 2012. These components are:
  1. Domain Controller (DC): - Domain Controllers are servers where the Active Directory Domain Services role is installed. The DC stores copies of the Active Directory Database (NTDS.DIT) and SYSVOL (System Volume) folder.
  2. Data Store: - It is the actual file (NTDS.DIT) that stores the Active Directory information.
  3. Domain: - Active Directory Domain is a group of computers and user accounts that share common administration within a central Active Directory database.
  4. Forest: - Forest is a collection of Domains that share common Active Directory database. The first Domain in a Forest is called a Forest Root Domain.
  5. Tree: - A tree is a collection of domain names that share common root domain.
  6. Schema: - Schema defines the list of attributes and object types that all objects in the Active Directory database can have.
  7. Organizational Units (OUs): - OUs are simply container or folders in the Active Directory that stores other active directory objects such as user accounts, computer accounts and so on. OUs are also used to delegate control and apply group policies.
  8. Sites: - Sites are Active Directory object that represent physical locations. Sites are configured for proper replication of Active Directory database between sites.
  9. Partition: - Active Directory database file is made up of multiple partitions which are also called naming contexts. The Active Directory database consists of partitions such as application, schema, configuration, domain and global catalog.


Installing Active Directory Domain Controller in Server 2012

In Windows Server 2012, the Active Directory Domain Controller role can be installed using the Server Manager or alternatively, using Windows PowerShell. The figure below 
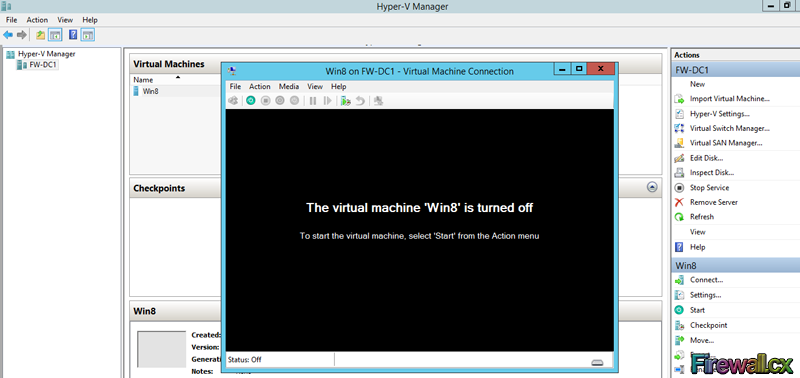
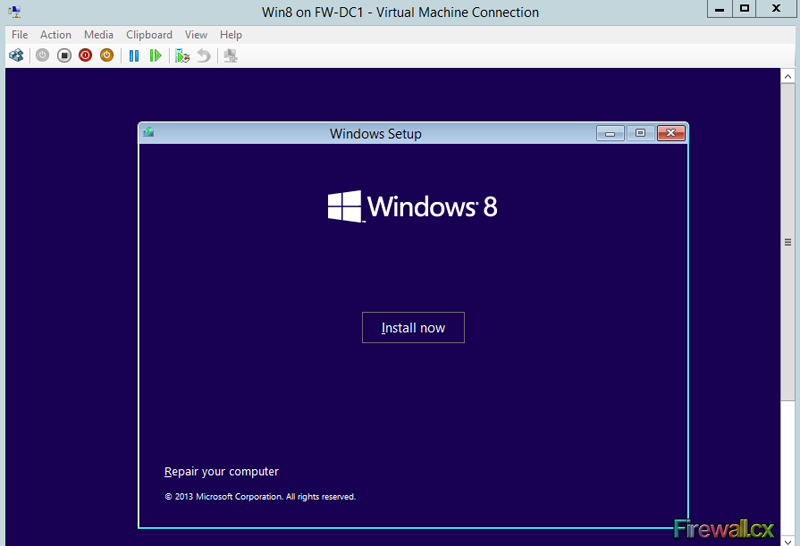
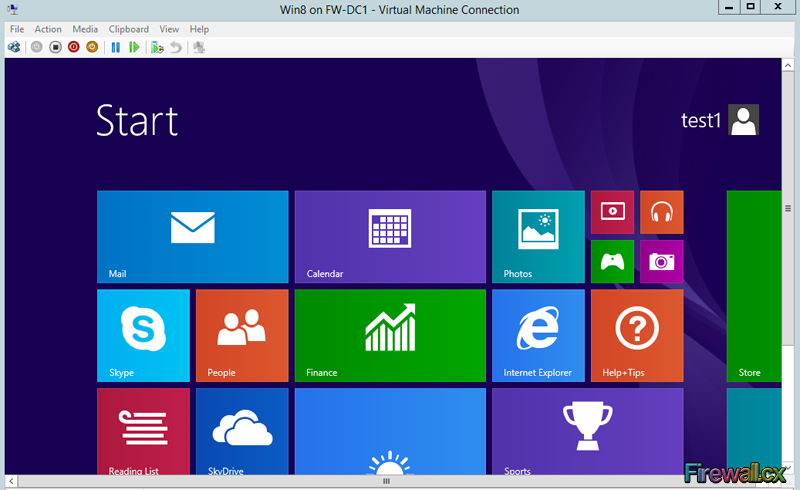
represents our lab setup which includes a Windows Server 2012 (FW-DC01) waiting to have the Active Directory Domain Services server role installed on it:
windows-2012-active-directory-installation-1
Notice that there are two Windows 8 clients waiting to join the Active Directory domain once installed.
A checklist before installing a Domain Controller in your network is always recommended. The list should include the following information:
  • Server Host Name – A valid Hostname or Computer Name must be assigned to domain controller. We've selected FW-DC01 as a server's host name.
  • IP Address – You should configure a static IP address, which will not be changed later on. In our example, we've used 192.168.1.1/24 which is a Class C IP address.
  • Domain Name – Perhaps one of the most important items on our checklist. We've used firewall.local for our setup. While many will want to use an existing public domain, e.g their company's domain, it is highly recommended this practice is avoided at all costs as it can create a number of problems with DNS resolution when internal hosts or servers are trying to resolve hosts that exist on both private and public name spaces.
Microsoft doesn't recommend the usage of a public domain name in an internal domain controller, which is why we selected firewall.local instead of firewall.cx.

Installing Active Directory Domain Controller using Server Manager

Initiating the installation of Active Directory is a simple process; however it does require Administrator privileges.
Open Server Manager, go to Manage and select Add Roles and Features:
windows-2012-active-directory-installation-2
Figure 2. Add Roles and Features
Click Next on the Before you begin page.

On the next screen, choose Role-based or feature-based Installation and click Next:
windows-2012-active-directory-installation-3
 Figure 3. Choose Role Based Installation
Select the destination server by choosing Select a server from the server pool option and select the server and click Next. In cases like our lab where there is only one server available, it must be selected:
windows-2012-active-directory-installation-4
 Figure 4. Select Destination Server
In the Select server roles page, select the Active Directory Domain Services role and click Next:
windows-2012-active-directory-installation-5
Figure 5. Select AD DS role
The next page is the Features page which we can safely skip by clicking Next

The Active Directory Domain Services page contains limited information on requirements and best practices for Active Directory Domain Services:
windows-2012-active-directory-installation-6
Figure 6. AD DS Page
Once you've read the information provided, click Next to proceed to the final confirmation page.
FREE Hyper-V Backup:  FREE for Firewall.cx readers for a Limited Time!  Download Now!
On the confirmation page, select Restart the destination server automatically if required and click on the Install button. By clicking Install, you confirm you are ready to begin the AD DS role installation:
windows-2012-active-directory-installation-7
Figure 7. AD DS Confirmation
Note: You cannot cancel a role installation once it begins
The Add Roles and Feature Wizard will continuously provide updates during the Active Directory Domain Services role installation, as shown below:
windows-2012-active-directory-installation-8
Figure 8. Installation Progress

Once the installation has completed successfully, we should expect to see the Installation succeeded message under the installation progress bar:
windows-2012-active-directory-installation-9
Figure 9. Successful Installation & Promote Server to DC


Promoting Server to Domain Controller

At this point we can choose to Promote this server to a domain controller by clicking on the appropriate link as highlighted above (Blue arrow).
After selecting the Promote this server to a domain controller option, the Deployment Configuration page will appear. Assuming this is the first domain controller in the network, as is in our case, select the Add a new forest option to setup a new forest, and then type the fully qualified domain name under root domain name section. We've selected to use firewall.local:
windows-2012-active-directory-installation-10
Figure 10. Configure Domain Name
Administrators who already have active directory installed would most likely select the Add a domain controller to an existing domain option. Having at least two Domain Controllers is highly advisable for redundancy purposes. When done click the Next button.
Now select Windows Server 2012 R2 for the Forest functional level and Domain functional level. By setting the domain and forest functional levels to the highest value that your environment can support, you'll be able to use as many Active Directory Domain Services as possible. If for example you do not plan to ever add domain controllers running Windows 2003, but might add a Windows 2008 server as a domain controller, you would select Windows Server 2008 for the Domain functional level. Next, click on the Domain Name System (DNS) server option as shown in the below figure:
windows-2012-active-directory-installation-11
Figure 11. DC Capabilities
The DNS Server role can be later on installed. If for any reason you need to install the DNS Server role later on, please read our How to Install and Configure Windows 2012 DNS Server Role article.
Since this is the first domain controller in the forest, Global Catalog (GC) will be selected by default. Now set the Directory Services Restore Mode (DSRM) password. DSRM is used to restore active directory in case of failure. Once done, click Next.
The next window is the DNS Options page. Here we might encounter the following error which can be safely ignored simply because of the absence of a DNS server (which we are about to install):
A delegation for this DNS server cannot be created because the authoritative parent zone cannot be found...
Ignore the error and click Next to continue.
In the next window, Additional Options, leave the default NetBIOS domain name and click Next. The Windows AD DS wizard will automatically remove the .local from the domain name to ensure compatibility with NetBIOS name resolution:
windows-2012-active-directory-installation-12
Figure 12. Additional Options

The next step involves the Paths selection which allows the selection of where to install the Database, Log Files and SYSVOL folders. You can either browse to a different location or leave the default settings (as we did). When complete, click Next:
windows-2012-active-directory-installation-13
Figure 13. Paths
Note: When the installation is complete, the Database folder will contain a file named NTDS.DIT. This important file is database file of your active directory.
Finally, the next screen allows us to perform a quick review of all selected options before initiating the installation: Once reviewed, click Next.
windows-2012-active-directory-installation-14
Figure 14. Review Options

The server will now perform some prerequisites check. If successful, it will show green check mark on the top. Some warnings may appear, however if these are non-critical, we can still proceed with the installation. Click the Install button to promote this server to domain controller:
windows-2012-active-directory-installation-15
Figure 15. Prerequisites Check

The installation begins and the server's installation progress is continuously updated:
windows-2012-active-directory-installation-16
Figure 16. Installation Begins
When the installation of Active Directory is complete, the server will restart.

Assuming we've restarted, we can now open Active Directory Users and Computers and begin creating user accounts, computer accounts, apply group policies, and so on.
windows-2012-active-directory-installation-17
Figure 17. Active Directory Users and Computers
As expected, under the Domain Controllers section, we found our single domain controller. If we were to add our new domain controller to an existing active directory, then we would expect to find all domain controllers listed here.

Hyper-V Best Practices - Replica, Cluster, Backup Advice

Hyper-V has proven to be a very cost effective solution for server consolidation. Evidence of this is also the fact that companies are beginning to move from VMware to the Hyper-V virtualization platform. This article will cover the Windows 2012 Hyper-V best practices, and aims to help you run your Hyper-V virtualization environment as optimum as possible.
Keeping your Hyper-V virtualization infrastructure running as smoothly as possible can be a daunting task, which is why we recommend engineers follow the best Hyper-V practices.
Different organizations have different setups and requirements: some of you might be moving from VMware to Hyper-V virtualization, while others might be upgrading from an older Hyper-V virtualization server to a newer one. Each scenario must follow the baseline or best practices,  to be able to run the virtualization infrastructure successfully – without problems.
FREE Hyper-V Backup:  Easy to use - Powerful features - Just works, no hassle:   It's FREE for Firewall.cx readers!  Download Now!
 

Hyper-V Best Practice List

Best practices for Hyper-V vary considerably depending on whether you're using clustered servers. As a general rule-of-thumb the best thing you can do is try to configure your host server and your Virtual Machines in a way that avoids resource contention to the greatest extent possible.
Organizations who are considering migrating their infrastructure to Hyper-V, or are currently running on the Hyper-V virtualization platform, need to take note of the below important points that must not be overlooked:

Processor

Minimum: A 1.4 GHz 64-bit processor with hardware-assisted virtualization. This feature is available in processors that include a virtualization option—specifically, processors with Intel Virtualization Technology (Intel VT) or AMD Virtualization (AMD-V) technology.
Hardware-enforced Data Execution Prevention (DEP) must also be available and enabled. For Intel CPUs, this translates to enabling the Intel XD (“execute disable”) bit or while for AMD CPUs, the AMD NX (“no execute”) bit.


Memory

Minimum: 512 MB.  This is the bare minimum; however a logical approach would be at least 4 Gigs of RAM per virtual server.  If one physical server is to host 4 Virtual Machines, then we would recommend at least 16GBs of Physical RAM, if not more.  SQL servers and other RAM intensive services would certainly lift the memory requirements a lot higher. You can never have enough memory.


Network adapters

At least one network adapter is required, but two or more are always recommended. Hyper-V allows the creation of three different virtual switches: Internal Virtual Switches, Private Virtual Switches and External Virtual Switches.
Internal virtual switches are used to allow the virtual machine to connect with its host machine (the physical machine that run’s Hyper-V). Private virtual switches are used when we only want to connect virtual machines, which run on the same host, between each other.  External virtual switches are used to allow the virtual machine to connect with our LAN network and this is where physical network adapters come in hand. 
Host machines with only one network adapter will be forced to share that network adapter with all its virtual machines. This is why it’s always best practice to have at least two network adapters available.  

Additional Considerations

The settings for hardware-assisted virtualization and hardware-enforced DEP are usually available from within in the system’s BIOS; however, the names of the settings may differ from the names identified previously.
For more information about whether a specific processor model supports Hyper-V (virtualization), it is recommended to check at the manufacturer’s website.
As noted before, it is important to remember after modifying the settings for hardware-assisted virtualization or hardware-enforced DEP, you may need to turn off the power to the server and then turn it back on to ensure the new CPU settings are loaded.

Microsoft Assessment and Planning Toolkit

Microsoft Assessment and Planning Toolkit (MAP) can be used to study existing infrastructure and determine the Hyper-V requirement. For organizations who are interested in server consolidation and virtualization through technologies such as Hyper-V, MAP helps gather performance metrics and generate server consolidation recommendations that identify the candidates for server virtualization and will even suggest how the physical servers might be placed in a virtualized environment.
The diagram below shows the MAP phases involved to successfully create the necessary reports:
hyper-v-best-practices-1
Figure 1. MAP Phases

Below is an overview of the Microsoft Assessment and Planning Toolkit application:
hyper-v-best-practices-2
Figure 2. MAP Overview
 The following points are the best practices which should be considered before deploying your Windows Server 2012 Hyper-V infrastructure:

HYPER-V HOSTS (Physical Servers)

  • Ensure hosts are up-to-date with recommended Microsoft updates
  • Ensure hosts have the latest BIOS version, as well as other hardware devices (such as Synthetic Fiber Channel, NIC’s, Raid bios, etc.)
  • Hosts must be part of a domain before you can create a Hyper-V High-Availability Cluster.
  • RDP Printer Mapping should be disabled on hosts, to remove any chance of a printer driver causing instability issues on the host machine. To do this, follow the below steps: Computer Configuration –> Policies –> Administrative Templates –> Windows Components –> Remote Desktop Services –> Remote Desktop Session Host –> Printer Redirection –> Do not allow client printer redirection –> Set to "Enabled”
  • Do not install any other Roles on a host besides the Hyper-V role and the Remote Desktop Services roles. Optionally, if the host will become part of a cluster, you can install Failover Cluster Manager. In the event the host connects to an iSCSI SAN and/or Fiber Channel, you can also install Multipath I/O.
  • Anti-virus software should exclude Hyper-V specific files using the Hyper-V: Antivirus Exclusions for Hyper-V Hosts article available from Microsoft.
  • Default path for Virtual Hard Disks (VHD/VHDX) should be set to a non-system drive, due to this can cause disk latency as well as create the potential for the host running out of disk space.
  • If you are using iSCSI: In Windows Firewall with Advanced Security, enable iSCSI Service (TCP-In) for Inbound and iSCSI Service (TCP-Out) for outbound in Firewall settings on each host. This will ensure iSCSI traffic is allowed to pass from host to the SAN device and back. Not enabling these rules will prevent iSCSI communication. To set the iSCSI firewall rules via netsh, you can use the following command:
PS C:\Windows\system32> Netsh advfirewall firewall set rule group=”iSCSI Service” new enable=yes
  • Periodically run performance counters against the host, to ensure optimal performance. Recommend using the Hyper-V performance counter that can be extracted from the (free) Codeplex PAL application: http://pal.codeplex.com/

HYPER-V Virtual Machines

  • Ensure you are running only supported guests in your environment.
  • Ensure you are using sophisticated backup software such as Altaro’s Hyper-V Backup which also includes free lifetime backup for a specific amount of VMs
  • If you are converting VMware virtual machines to Hyper-V, consider using MVMC (a free, stand-alone tool offered by Microsoft) or VMM.
  • Disk2vhd is a Tool which can be used to convert a Physical Machine to a Hyper-V Virtual Machine (P2V). The VHD file created can then be imported in to Hyper-V.
FREE Hyper-V Backup:  FREE for Firewall.cx readers for a Limited Time!  Download Now!
 

HYPER-V PHYSICAL NICs

  • Ensure Network Adapters have the latest firmware and drivers, which often address known issues with hardware and performance.
  • TCP Chimney Offload is not supported with Server 2012 software-based NIC teaming, because TCP Chimney has the entire networking stack offloaded to the NIC. If however software-based NIC teaming is not used, you can leave TCP Chimney Offload enabled. To disable TCP Chimney Offload, from an elevated command-prompt, type the following command:
PS C:\Windows\system32> netsh int tcp set global chimney=disabled
  • Jumbo frames should be turned on and set for 9000 or 9014 (depending on your hardware) for CSV, iSCSI and Live Migration networks. To verify Jumbo frames have been successfully configured, run the following command from all your Hyper-V host(s) to your iSCSI SAN:
PS C:\Windows\system32> ping 10.50.2.35 –f –l 8000
This command will ping the SAN (e.g. 10.50.2.35) with an 8K packet from the host. If replies are received, Jumbo frames are properly configured. Note that in the case a network switch exists between the host and iSCSI SAN, Jumbo frames must be enabled on that as well.
hyper-v-best-practices-3
 Figure 3. Jumbo Frame Ping Test
  • Management NIC should be at the top (1st) in NIC Binding Order. To set the NIC binding order: Control Panel --> Network and Internet --> Network Connections. Next, select the advanced menu item, and select Advanced Settings. In the Advanced Settings window, select your management network under Connections and use the arrows on the right to move it to the top of the list.
  • If using NIC teaming inside a guest VM, follow this order: Open the settings of the Virtual Machine, Under Network Adapter, select Advanced Features, in the right pane, under Network Teaming, tick the “Enable this network adapter to be part of a team in the guest operating system”. Once inside the VM, open Server Manager. In the All Servers view, enable NIC Teaming from Server:
hyper-v-best-practices-4
Figure 4. Enable NIC Teaming

HYPER-V DISKS

  • New disks should use the VHDX format. Disks created in earlier Hyper-V iterations should be converted to VHDX, unless there is a need to move the VHD back to a 2008 Hyper-V host.
  • Disk used for CSV must be partitioned with NTFS. You cannot use a disk for a CSV that is formatted with FAT, FAT32, or Resilient File System (ReFS).
  • Disks should be fixed in a production environment, to increase disk throughput. Differencing and Dynamic disks are not recommended for production, due to increased disk read/write latency times (differencing/dynamic disks).
  • Shared Virtual Hard Disk: Do not use a shared VHDx file for the operating system disk. Servers should have a unique VHDx (for the OS) that only they can access. Shared Virtual Hard Disks are better used as data disks and for the disk witness.
  • Use caution when using snapshots. If not properly managed, snapshots can cause disk space issues, as well as additional physical I/O overhead.
  • Page file on Hyper-V Host should manage by the OS and not configured manually.
  • It is not supported to create a storage pool using Fiber Channel or iSCSI LUNs.


HYPER-V MEMORY

  • Use Dynamic Memory on all VMs (unless not supported).
  • Guest OS should be configured with (minimum) recommended memory


HYPER-V CLUSTERS

  • Set preferred network for CSV communication, to ensure the correct network is used for this traffic. The lowest metric in the output generated by the PowerShell command below, will be used for CSV traffic. First, open a PowerShell command-prompt (using “Run as administrator”) Secondly, you’ll need to import the “FailoverClusters” module. Type the following at the PowerShell command-prompt:
PS C:\Windows\system32> Import-Module FailoverClusters
Next, we’ll request a listing of networks used by the host, as well as the metric assigned. This can be done by typing the following:
PS C:\Windows\system32> Get-ClusterNetwork | ft Name, Metric, AutoMetric, Role
In order to change which network interface is used for CSV traffic, use the following PowerShell command:
PS C:\Windows\system32> (Get-ClusterNetwork "CSV Network").Metric=900
This will set the network named "CSV Network" to 900
hyper-v-best-practices-5
Figure 5. Get Cluster Network
  • Set preferred network for Live Migration, to ensure the correct network(s) are used for this traffic following these steps: Open Failover Cluster Manager, Expand the Cluster , Next, right-click on Networks and select Live Migration Settings , Use the Up/Down buttons to list the networks in order from most preferred (at the top) to least preferred (at the bottom) , Uncheck any networks you do not want used for Live Migration traffic , Select Apply and then press OK , Once you have made this change, it will be used for all VMs in the cluster
  • The Host Shutdown Time (ShutdownTimeoutInMinutes registry entry) can be increased from the default time. This setting is usually increased when additional time is needed by VMs in order to ensure they have had enough time to shut down before the host reboots.
Registry Key: HKLM\Cluster\ShutdownTimeoutInMinutes 
Enter minutes in Decimal value.
Note: Changing of this registy value requires a server reboot in order to take effect:
hyper-v-best-practices-6
Figure 6. Registry Shutdown Option
  • Run the Cluster Validation periodically to remediate any issues


HYPER-V REPLICA

  • Run the Hyper-V Replica Capacity Planner. The Capacity Planner for Hyper-V Replica, allows you to plan your Hyper-V Replica deployment based on the workload, storage, network and server characteristics.
  • Update inbound traffic on the firewall to allowTCP port 80 and/or port 443 traffic. (In Windows Firewall, enable “Hyper-V Replica HTTP Listener (TCP-In)” rule on each node of the cluster. Shell commands to achieve the above are:
PS C:\Windows\system32> netsh advfirewall firewall set rule group="Hyper-V Replica HTTP" new enable=yes
PS C:\Windows\system32> netsh advfirewall firewall set rule group="Hyper-V Replica HTTPS" new enable=yes
  • Virtual hard disks with paging files should be excluded from replication, unless the page file is on the OS disk.
  • Test failovers should be performed monthly, at a minimum, to verify that failover will succeed and that virtual machine workloads will operate as expected after failover


HYPER-V CLUSTER-AWARE UPDATING

  • Place all Cluster-Aware Updating (CAU) Run Profiles on a single File Share accessible to all potential CAU Update Coordinators. Run Profiles are configuration settings that can be saved as an XML file called an Updating Run Profile and reused for later Updating Runs.


HYPER-V SMB 3.0 FILE SHARES

  • An Active Directory infrastructure is required, so you can grant permissions to the computer account of the Hyper-V hosts.
  • Loopback configurations (where the computer that is running Hyper-V is used as the file server for virtual machine storage) are not supported. Similarly, running the file share in VM’s that are hosted on computer nodes that will serve other VM’s is not supported.


HYPER-V INTEGRATION SERVICES

  • Ensure Integration Services (IS) have been installed on all VMs. IC's significantly improve interaction between the VM and the physical host.


HYPER-V OFFLOADED DATA TRANSFER (ODX) Usage

  • If your SAN supports ODX; you should strongly consider enabling ODX on your Hyper-V hosts, as well as any VMs that connect directly to SAN storage LUNs.
To enable ODX, open PowerShell (using ‘Run as Administrator’) and type the following:

C:\>  Set-ItemProperty hklm:\system\currentcontrolset\control\filesystem -Name "FilterSupportedFeaturesMode" –Value 0

Be sure to run this command on every Hyper-V host that connects to the SAN, as well as any VM that connects directly to the SAN.

This concludes our Windows 2012 Hyper-V Best Practices article. We hope you’ve found the information provided useful and that it helps make your everyday administration a much easier task.

The Importance of a Hyper-V Server Backup Tool - 20 Reasons Why You Should Use One

Using Hyper-V Server virtualization technology, you can virtualize your physical environment to reduce the cost of physical hardware. As part of IT best practices, you implement monitoring solutions to monitor the Hyper-V Servers and virtual machines running on them. You also take necessary actions to provide security to production environment by means of installing antivirus software. Then it also becomes necessary that you implement a backup mechanism to restore the business services as quickly as possible using a Hyper-V Server Backup tool.
This article is written to let you know as to why it is important to choose a dedicated Hyper-V Backup tool rather than relying on the existing mechanism as explained in bullet points below.
FREE Hyper-V Backup:  Easy to use - Powerful features - Just works, no hassle:   It's FREE for Firewall.cx readers!  Download Now!

1. Flexibility

Third-party backup products are designed in such a way that the product is easy to use when it comes to backup or restore a virtual machine running on the Hyper-V Server. For example, using third-party backup product, you can select a virtual machine to backup or restore. In case of any disaster with a virtual machine, it becomes easy for an IT administrator to use the flexible backup product’s console to restore a virtual machine from backup copies and restore the business services as quickly as possible.

2. Verification of Restores

Third-party backup products provide features to verify restores without impacting the production workload. IT administrators can use the verification feature to restore the backup copies to a standalone environment to make sure these backup copies can be restored successfully in the future, if required.

3. Designed for use with Hyper-V

A third-party backup product is designed to use with a specific technology. For example, SQL Server Backup products are designed to backup/restore SQL Server database. Similarly, third-party Hyper-V Backup Products are designed to use specifically with Hyper-V Servers. Since these dedicated Hyper-V backup products are integrated with Hyper-V closely, they are more trusted by the IT organizations.

4. Full Backup Copy of Virtual Machine

Although, starting with Windows Server 2012, Hyper-V Server offers replication services, sometimes referred as Hyper-V Replica, which can be used to build a disaster recovery scenario. The replication takes place every 5 minutes and changed data are replicated to the Hyper-V Servers located on the disaster recovery site. At the disaster site, you only have changed copies to restore virtual machine from a failure. What if you need to restore the full virtual machine? In that case, you would require the full backup copy of the virtual machine which is only possible if you are using a dedicated Hyper-V backup product.

5. Maintaining Different Versions of Backup Copies

There are several reasons to maintain different versions of backup copies. One of the reasons is to revert back configuration to a point-in-time and another reason is to restore the business services as quickly as possible from a backup copy of your choice. A dedicated Hyper-V backup product can maintain several backup copies of a virtual machine.

6. Agenltess Backups/Restores

Most of the third-party Hyper-V Backup products ship without an Agent. An agent is a piece of software which is installed on a Hyper-V server with communicates with the Backup software. In case of an agentless backup software, it is easy for administrators to perform backup/restore operations without worrying about the agent’s response.

7. Timely backing up virtual machines

As part of the standard IT process, many organizations have a strategy in place in which backups for critical IT components including virtual machines are scheduled in a timely manner. These backups ensure that in case of any disaster (including physical), the service can be restored from a backup copy taken from a dedicated backup product rather than relying on native methods. The backup copy not only allows you to restore services but also helps you understand the impact of restoring a backup copy which is older.

8. Centralized Management

Backup software ships with a centralized management tool. The centralized management tool is capable of managing multiple Hyper-V Servers and checking the backup operations on multiple Hyper-V servers from a single console.

9. Avoid unnecessary Files Backup

Since the backup software is designed to work with a specific technology, it is designed in such a way that it excludes the files which are not necessary to include in the virtual machine backup copies. This helps in reducing the backup copy size.

10. Compression

A dedicated Hyper-V backup product offers compressing backup data before it is written to the backup drive. You can enable/disable compression for all or selected virtual machines using the third-party backup product’s console.

11. Encryption

Security is the major concern for IT organizations nowadays. Third-party Hyper-V Backup products use encryption technology to encrypt backup copies stored on a backup drive. These backup copies can only be read by the same Hyper-V backup product.

12. Backup and Offsite Location

As part of the IT processes, every organization ensures that the backup copies are kept at an off-site location and these backup copies can be retrieved easily when the disaster takes place at the production site. Native tools do not support taking backup to an off-site location. Third-party backup products can provide off-site backup feature in which backup copiescan be saved to an off-site location without requiring much network bandwidth.

13. Incremental Backup Copies

A dedicated Hyper-V backup product ensures that only changed contents are backed up rather than taking a full backup copy every time the backup job runs.

14. More Backup Options

Third-party backup products provide more backup options like taking daily backups or monthly backups which can be scheduled at a pre-defined interval using the centralized management console.

15. Backup to External Sources

Third-party Hyper-V backup products support backing up virtual machines to external sources including USB external devices, eSata External drives, USB flash drives, Fileserver network shares, NAS devices, and RDX cartriges.

16. Backup Retention Policies

Old backup copies can be deleted if they are not required. You can configure the backup retention policy for each virtual machine. A dedicated Hyper-V Backup product can take automatic actions to delete the older backup copies as per the retention policy you configure.

17. Ability to Restore individual files or folders

Without using a dedicated Hyper-V backup product, it would be difficult for IT administrators to restore individual files/folders from a virtual machine backup copy. Some backup products provide a feature called “Exchange Level Item Restore” which can be used to restore selected emails or mailboxes from a backup copy of a virtual machine.

18. Application Vendor Recommendation for Backup Products

Many of the application vendors require that an enterprise backup system is installed in the production environment to backup data of their applications running in the virtual machines. Since most of the vendors impose this requirement, or recommend to back up application data using a dedicated Hyper-V backup product, native backup tools fail to do so.

19. Error and Reporting

Error and Reporting are the main features a third-party backup product provides. It lets you take necessary actions if a failure takes place with a backup or restore operation. Using reporting feature of a backup product, you can know how many virtual machines have been backed up successfully and how many virtual machines have failed.

20. Support

In case if you’re not able to restore virtual machine from a backup copy or hit with an error during the restore or backup operation, you can always contact product support to get you out from this situation. Many third-party backup products provide 24/7 support for their products.
FREE Hyper-V Backup:  Easy to use - Powerful features - Just works, no hassle:   It's FREE for Firewall.cx readers!  Download Now!

Altaro Hyper-V Backup

Altaro Hyper-V Backup offers a simple, easy-to-use solution for backing up Hyper-V VMs. It includes features such as offsite backup, remote management, Exchange item-level Restore, Compression, Encryption, and much more at an affordable cost.
Learn more or try Altaro Hyper-V Server Backup Tool for yourself: http://www.altaro.com/hyper-v-backup/. It’s completely free, forever for up to 2 VMs.

How to Install Windows Server 2012 from USB Flash – ISO Image

Most would remember the days we had to have a CDROM or DVDROM in order to proceed with the installation of an operating system. Today, it is very common installing an operating system direct from an ISO image. When dealing with virtualized systems, it becomes pretty much a necessity.
This article will show how to install Windows Server 2012 (the same process can be used for almost all other operating systems) from a USB Flash.
The only prerequisite for this process to work is that you have a USB Flash big enough to fit the ISO image and the server (or virtualization platform) supports booting from a USB Flash. If these two requirements are met, then it’s a pretty straight-forward process.
 FREE Hyper-V Virtualization Backup:  FREE for Firewall.cx readers for a Limited Time!  Download Now!

The Windows 7 USB-DVD Tool

The Windows 7 USB/DVD Tool is a freely distributed application available in our Administrator Utilities download section. The application is required to transfer/copy the ISO Image of the operating system we want to install, to our USB Flash. The application is also able to burn the ISO image directly on a DVD – a very hand feature.
Download a copy, install and run it on the computer where the ISO image is available.
When the tool runs, browse to the path where the ISO image is located. Once selected, click on Next:
Installing Windows 2012 via USB Flash

At this point, we can choose to copy the image to our USB device (USB Flash) or directly on to a DVD. We select the USB Device option:
windows-2012-installation-usb-flash-2

In the next screen, we are required to select the correct USB device. If there are more than one USB storage devices connected, extra care must be taken to ensure the correct USB Flash is selected. In case no USB Flash has been connected, insert it now into your USB port and click on the refresh button for it to appear:
windows-2012-installation-usb-flash-3

After selecting the appropriate USB device, click on Begin Copying to start the transfer of files to the USB Flash:
windows-2012-installation-usb-flash-4

Once the copy process is complete, we are ready to remove our USB Flash and connect it to our server:
windows-2012-installation-usb-flash-6

Creating a Virtual Machine in Windows Hyper-V. Configuring Virtual Disk, Virtual Switch, Integration Services and other Components

Steps to Create a Virtual Machine in Hyper-V

To begin the creation of our first virtual machine, open the Hyper-V manager in Windows Server 2012. On the Actions pane located on the right side of the window, click New and select Virtual Machine:
windows-hyper-v-host-1

Read the Before you begin page which contains imporant information and then click Next:
Windows Hyper-V Creating new VM

Type name of the virtual machine and configure the location to store virtual hard disk of this virtual machine. On server systems with shared storage devices, the virtual hard disk is best stored on the shared storage for performance and redundancy reasons, otherwise select a local hard disk drive. For the purpose of this lab, we will be using the server’s local C Drive:
Windows Hyper-V Specify VM Name

Choose the generation of virtual machine and click Next. Generation 2 is new with Server 2012 R2. If the guest operating system will be running Windows Server 2012 or 64bit Windows 8, 8.1, select Generation 2, otherwise select Generation 1:
Hyper-V Installing VM & Selecting VM Generation

Next step involves assigning the amount of necessary memory. Under Assign Memory configure the memory and click Next. For the purpose of this lab, we will give our Windows 8.1 guest operating system 1 GB memory:
Hyper-V Assigning Memory to VM

Under configure networking tab, leave the default setting and click Next. You can create virtual switches later and re-configure the virtual machine settings as required:
Hyper-V Installing VM - Configuring VM Switch

Next, choose to create a virtual hard disk and specify the size. We allocated a 60 GB disk size for our Windows 8.1 installation. When ready, click Next:
Hyper-V Configuring Virtual Hard Disk

One of the great benefits with virtual machines is that we can proceed with the installation of the new operating system using and ISO image, rather than a CD/DVD.
Browse to the selected ISO image and click the Next button. The virtual machine will try to boot from the selected ISO disk when it starts, so it is important to ensure the ISO image is bootable:
Hyper-V Installing VM from ISO Image

The last step allows us to review the virtual machine’s configuration summary. When ready click the Finish button:
Hyper-V VM Summary Installation


Install Windows 8.1 Guest Operating System in Hyper-V Virtual machine

With the configuration of our virtual machine complete, it’s time to power on our virtual machine and install the operating system. Open Hyper-V Manager, and under the Virtual Machines section double-click the virtual machine created earlier. Click on the start button from the Action Menu to power on the virtual machine:
Hyper-V Starting a VM Machine

After the virtual machine completes its startup process, press any key to boot from the Windows 8.1 disk (ISO media) we configured previously. The Windows 8 installation screen will appear in a couple of seconds. Click Next followed by the Install Now button to begin the installation of Windows operating system on the virtual machine:
Hyper-V Begin Windows 8 VM installation

 After accepting the End User License Agreement (EULA) we can continue our post-installation setup by configuring the hard disk. Windows will then begin its installation and update the screen as it progresses. Finally, once the installation is complete, we are presented with the Personalization screen and finally, the Start Screen:
Hyper-V VM Windows8 Start Screen

After the operating system installation and configuration is complete, it is important to proceed with the installation of Integration Services.
Integration Services on Hyper-V is what VM Tools is for VMware. Integration Services will help significantly enhance the VM’s guest operating system performance, allow file copy from the host machine to the guest machine easily, time synchronization between host and guest machines, improve management of the VM by replacing the generic operating system drivers for the mouse, keyboard, video card, network and SCSI controller components.
Other services offered by Integration Services are:
  • Backup (Volume Snapshot)
  • Virtual Machine Connection Enhancements
  • Hyper-V Shutdown Service
  • Data Exchange
 To proceed with the installation of Integration Services, Go to the Virtual Machine’s console, selection Action, and click Insert Integration Services Setup Disk as shown below:
Hyper-V Host Intergration Services installation

In the Upgrade Hyper-V Integration Services dialog box, click OK and when prompted, click Yes to restart the virtual machine.  Using the Hyper-V Manager console, administrators can keep track of all VM's installed along side with their CPU Usage, Assigned memory and uptime:
Hyper-V Manager - VM Status

How to Install Windows 2012 Hyper-V via Server Manager & Windows PowerShell. Monitoring Hyper-V Virtual Machines

introduction to Microsoft Hyper-V

Our previous article covered the basic concepts of Virtualization and Windows Server 2012 Hyper-V.  This article takes a closer look at Microsoft’s Hyper-V Virtualization platform and continues with the installation of the Hyper-V role via the Windows Server Manager interface and Windows PowerShell command prompt.
FREE Hyper-V Backup: Easy to use - Powerful features - Just works, no hassle: It's FREE for Firewall.cx readers! Download Now!
Hyper-V is a server role used to create virtualized environment by deploying different types of virtualization technologies such as server virtualization, network virtualization and desktop virtualization. The Hyper-V Server role can be installed in Server 2012 R2 Standard, Datacenter or Essentials edition. Hyper-V version 3.0 is the latest version of Hyper V server available in Windows Server 2012 R2 versions. Additional Windows 2012 Server and Hyper-V technical articles can be found in our Windows 2012 Server section.
To learn more about the licensing restrictions on each Windows Server 2012 edition, read our article Windows 2012 Server Foundation, Essential, Standard & Datacenter Edition Differences, Licensing & Supported Features. 

Hyper-V Hardware Requirements

The Hyper-V server role requires specific system-hardware requirements to be met. The minimum hardware requirements are listed in the table below:
Hardware
Minimum Requirements
Processor
  • 1.4Ghz 64-bit with hardware assisted virtualization. Available in processors that include a virtualization option—specifically, Intel Virtualization Technology (Intel VT) or AMD Virtualization (AMD-V)
  • Hardware-enforced Data Execution Prevention (DEP) must be available and enabled. Specifically, you must enable the Intel XD bit (execute disable bit) or AMD NX bit (no execute bit).
Memory
512 MB
Network Adapter
At least one Gigabit Ethernet adapter
Disk Space
32 GB
Keep in mind that the above table specifies the minimum requirements. If you wanted to install Hyper-V in a production environment along with a number of virtual machines, you will definitely need more than 512MB memory and 32GB disk space.

Installing The Hyper-V Server Role in Server 2012 Using Server Manager

In Windows Server 2012, you can install Hyper-V server role by using the Server Manager (GUI) or windows PowerShell. In both cases, the installation requires the user to be an Administrator or member of Administrators or Hyper-V administrators group.
At first, open Server Manager. Click Manage and select the Add Roles and Features option:
windows-2012-hyper-v-install-config-1Add Role and Features
FREE Hyper-V Backup: Easy to use - Powerful features - Just works, no hassle: It's FREE for Firewall.cx readers! Download Now!
Click Next on the Before you begin page.
Choose Role-based or feature-based Installation option and click Next button:
windows-2012-hyper-v-install-config-2
 Choose Role-based or feature-based Installation

In the next window, click on Select a server from the server pool option and select the server where you would like to install the Hyper-V server role. Click on Next after selecting the server:
windows-2012-hyper-v-install-config-3
 Select the Destination Server to Install Hyper-V

The next screen lists the available roles for installation, check Hyper-V and click Next:
windows-2012-hyper-v-install-config-4
Selecting the Hyper-V Role for Installation

Read the Hyper-V role information and click the Next button:
windows-2012-hyper-v-install-config-5
 Hyper -V Installation

The next step involves the creation of Virtual Switches. Choose your server’s physical network adapters that will take part in the virtualization:
windows-2012-hyper-v-install-config-6
Creating Your Virtual Switches
The selected physical network adapters (in case you have more than one available) will be used and shared by virtual machines to communicate with the physical network. After selecting the appropriate network adaptors, click Next to proceed to the Migration screen.
Under Migration, leave the default settings as is and click Next:
windows-2012-hyper-v-install-config-7
Leave Default Migration Settings
These settings can also be modified later on. Live Migration is similar to VMware’s vMotion, allowing the real-time migration of virtual machines to another physical host (server).
Under Default Stores, you can configure the location of hard disk files and configuration files of all virtual machines. This is a location where all the virtual machine data will reside. You can also configure a SMB shared folder (Windows network folder), local drive or even a shared storage device.
We will leave the settings to their default location and click the Next button.
windows-2012-hyper-v-install-config-8
Selecting a Location to Store the Virtual Machines

The final screen allows us to review our configuration and proceed with the installation by clicking on the Install button:
windows-2012-hyper-v-install-config-9
Hyper-V Installation Confirmation

Windows will now immediately begin the installation of the Hyper-V role and continuously update the installation window as shown below.
windows-2012-hyper-v-install-config-10
Hyper-V Installation Progress
Once the installation of Hyper-V is complete, the Windows server will restart.

Installing Hyper-V role using Windows PowerShell

The second way to install the Hyper-V role is via Windows PowerShell. Surprisingly enough, the installation is initiated with a single command.
Type the following cmdlet in PowerShell to install the Hyper-V server role your Windows Server 2012:
C:\Users\Administrator> Install-WindowsFeature  –Name Hyper-V  –IncludeManagementTools  –Restart
windows-2012-hyper-v-install-config-11-large 
Hyper-V Installation with PowerShell   
To install Hyper-V server role on remote computer, include the -ComputerName switch.  In our example, the remote computer was named Voyager:
C:\Users\Administrator> Install-WindowsFeature –Name Hyper-V –ComputerName Voyager –IncludeManagementTools –Restart
Once the installation is complete, the server will restart. Once the server has booted, you can open Hyper-V Server Manager and begin creating the virtual machines:
windows-2012-hyper-v-install-config-12
Hyper-V Manager

Monitoring of Hyper-V Virtual Machines

When working in a virtualization environment, it is extremely important to keep an eye on virtualization service and ensure everything is running smoothly.
Thankfully, Microsoft provides an easy way to monitor Hyper-V elements and take action before things get to a critical stage.
The Hyper-V Manager console allows you to monitor processor, memory, networking, storage and overall health of the Hyper-V server and its virtual machines, while other Hyper-V monitoring metrics are accessible through Task Manager, Resource Monitor, Performance Monitor and Event Viewer to monitor different parameters of Hyper-V server.
The screenshot below shows the Hyper-V Manager with one virtual machine installed.  At a first glance, we can view the VM’s state, CPU Usage, Assigned Memory and Uptime:
windows-2012-hyper-v-install-config-13-large
View Virtual Machine Status

Under Window’s Event Viewer we’ll find a number of advanced logs that provide a deeper view of the various Hyper-V components, as shown below:
windows-2012-hyper-v-install-config-14
Hyper-V Events (click to enlarge)

Addition information on Hyper-V can be obtained through the usage of Window’s Performance Monitor, which provides a number of Hyper-V useful counters as shown below:
windows-2012-hyper-v-install-config-15
Hyper-V Performance Monitor
Most experienced virtualization administrators will agree that managing and monitoring a virtualization environment can be a full-time job. It is very important to ensure your virtualization strategy is well planned and VMs are hosted on servers with plenty of resources such as Physical CPUs, RAM and Disk storage space, to ensure they are not starved of these resources during periods of high-utilization.